Overview
This tutorial will show you how to add a custom server to a game on Steam. While the example below uses ARK as an example, this can be done with just about any Steam game.
Add the Server to your Favorites
The first thing we need to do, is add our new server to Steam. This is done from Steam itself and does not require the game to be running, however the server will need to be.
- If Steam is not already running, start the program and log in to your account.
- Bring up the main Steam window by double-clicking on its icon in your Taskbar.

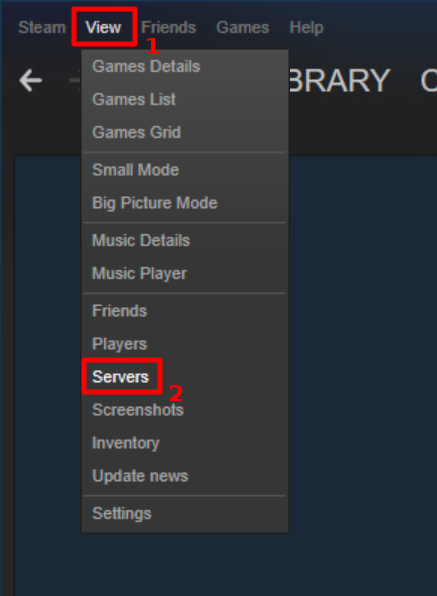
- Next, click the View menu option and select Servers.

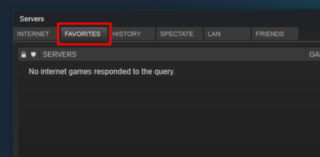
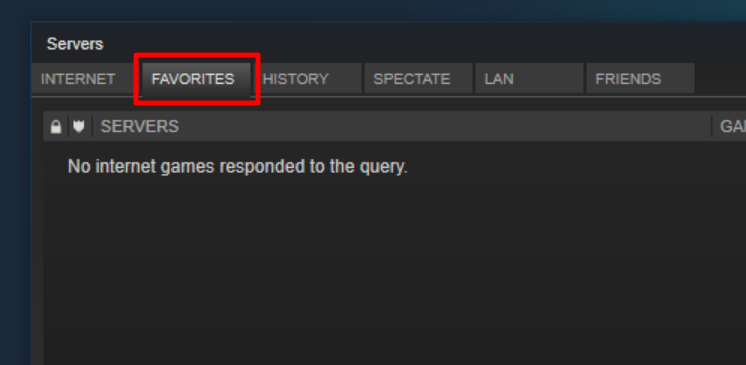
- Then, in the Servers window that appears, go to the Favorites tab.
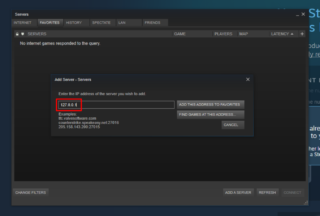
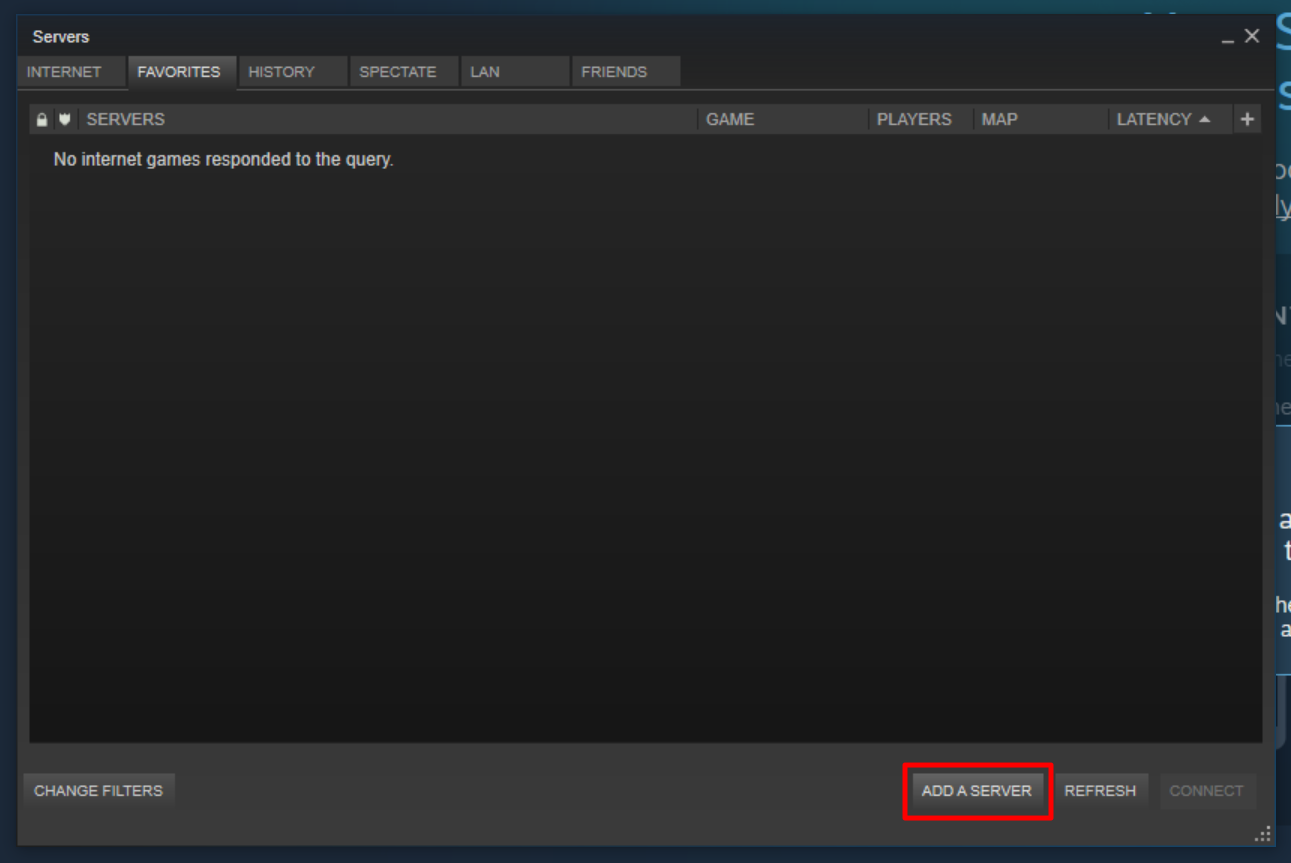
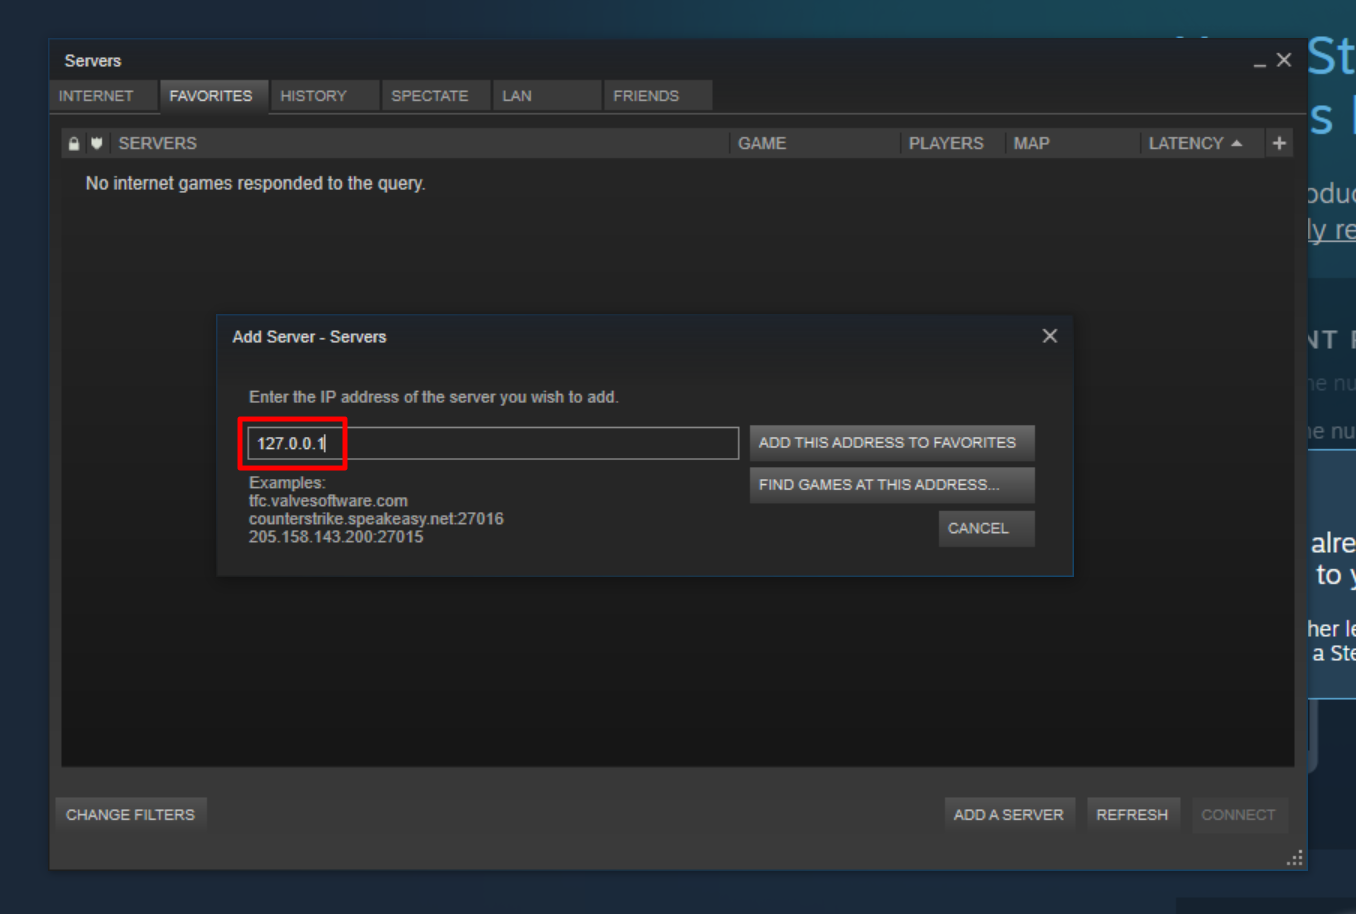
- Click the Add a Server button.

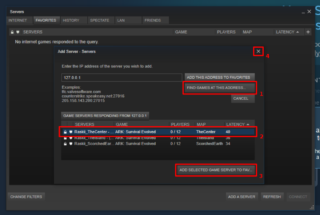
- In the field, enter the IP address or hostname of the server you are adding.
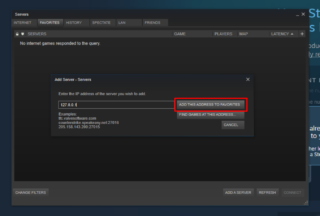
Note: If you are connecting to a server that’s not on a static IP but is using a hostname, it’s important to know that the current IP address will be used to create the favorite. This means that when the server’s IP address changes, your favorite will stop working. If this happens, you will need to delete the favorite and create it again from scratch. - If the server you are adding is the only server running on that address, go ahead and click Add this Address to Favorites and you’re done!.
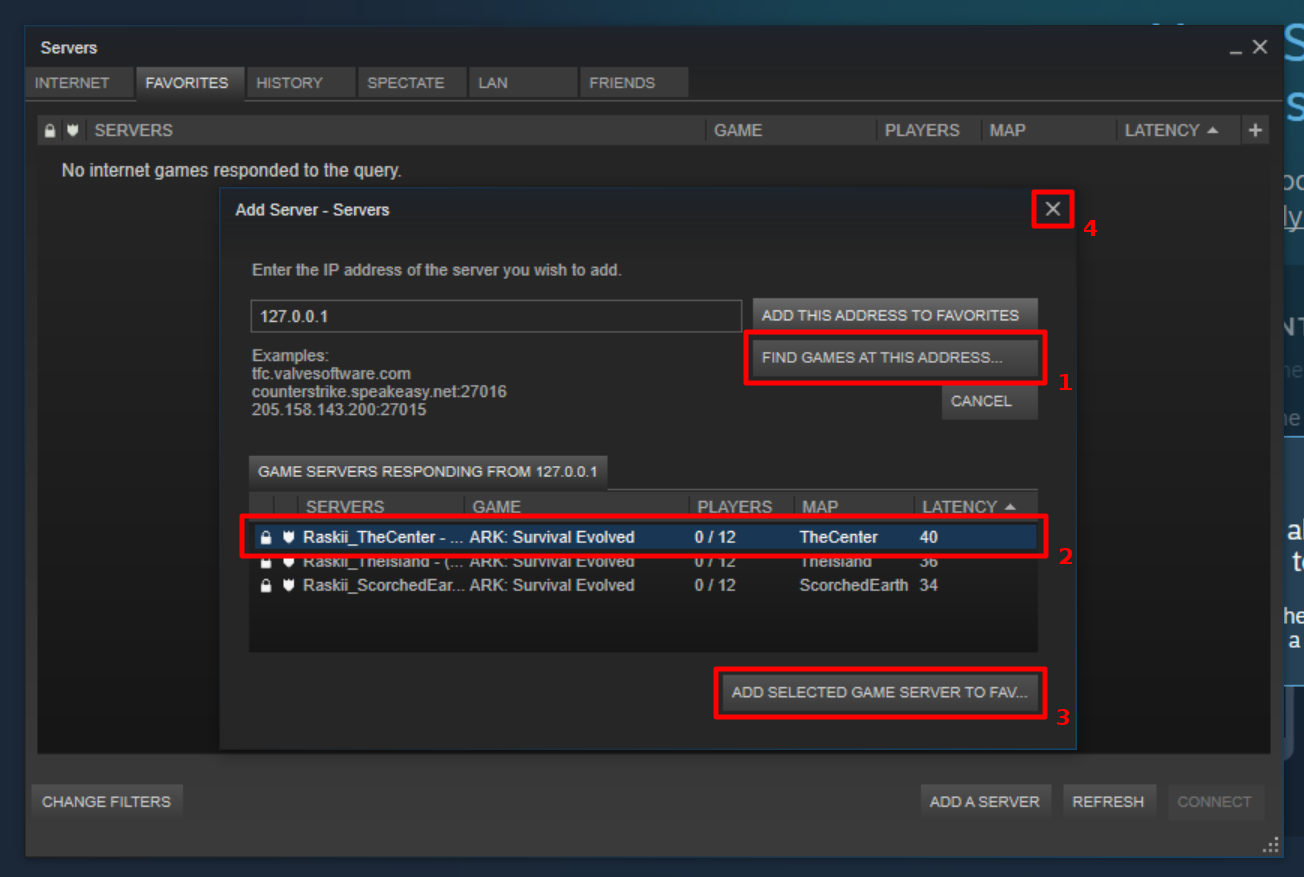
- If, however, multiple servers are being run at this address, there are a couple of extra steps.
- Click the Find Games at this Address button to show a list of all servers running.
- Highlight the server you want to add, and click the Add Selected Game Server to Favorites button.
- Repeat as necessary to add any other servers you want.
- Once you’ve added all of the servers you want, click the X in the top right corner to close the Add Servers Window.

Joining the Server
Once the server has been added, the only thing left to do is connect to it and play!
Connecting from Steam
One method of connecting to your server is from the Steam Servers Window. This will load the game and begin the process of connecting to the server for you. Be aware however, that some Early Access games do not always work well when using this method. For that reason, the method below, Connecting from In-game, is preferred.
- If Steam is not already running, start the program and log in to your account.
- Bring up the main Steam window by double-clicking on its icon in your Taskbar.
- Next, click the View menu option and select Servers.
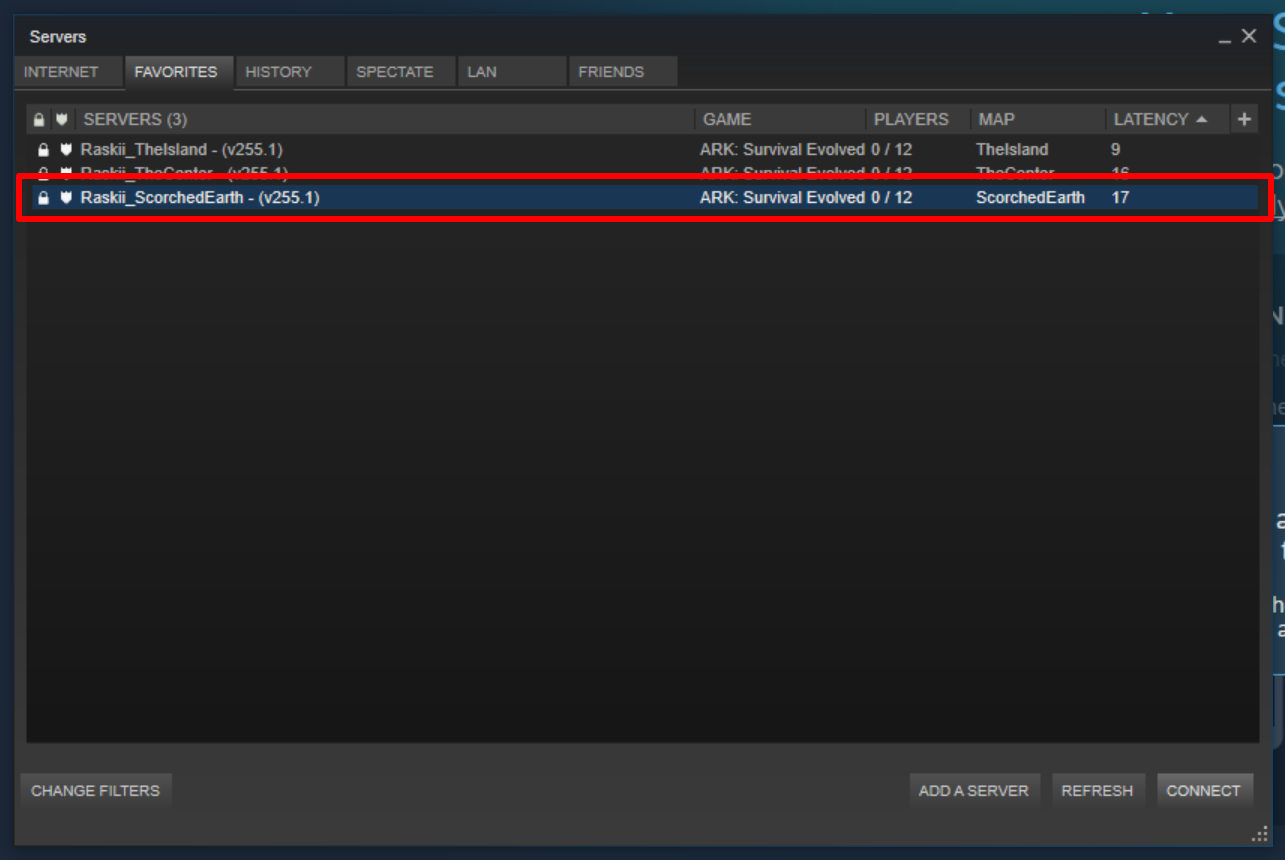
- Then, in the Servers window that appears, go to the Favorites tab.
- From there, just double-click on the server you want to join and viola, Steam will start the appropriate game for you and automatically connect to the server!
Connecting from In-game
Possibly the easiest method of connecting to your custom server is to do so from inside the game itself. In this post, I’ll be using ARK: Survival Evolved for my example.
Note: The specific steps for connecting to your server can vary from game-to-game. For this reason, the instructions below should only be used as a general guideline.
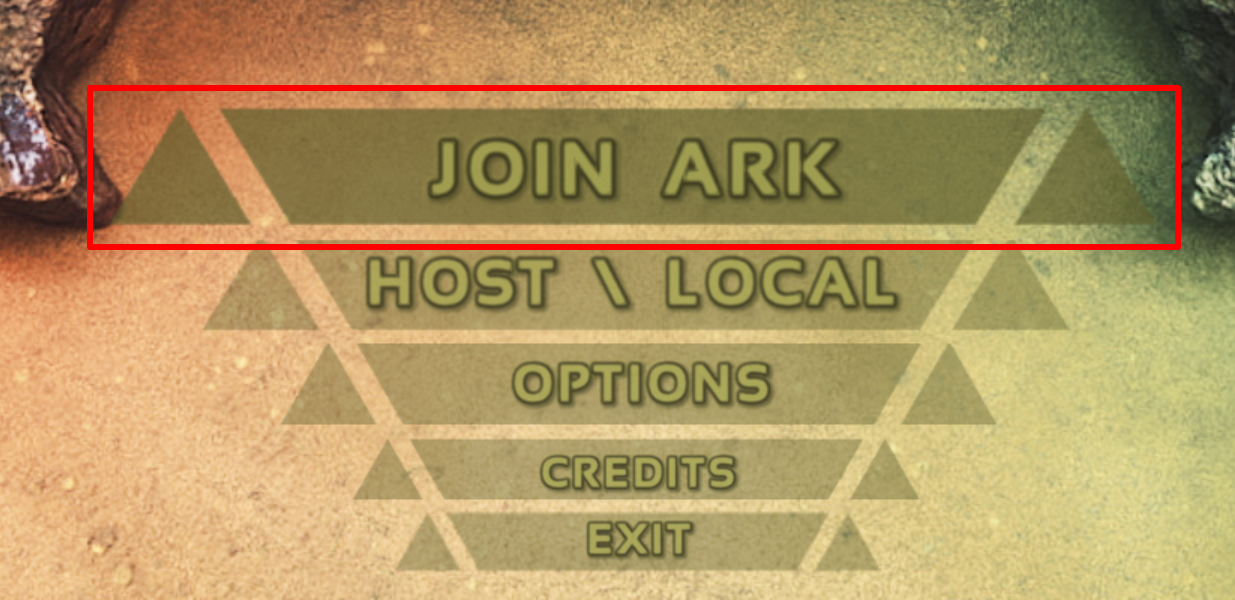
- Start the game by either running it directly or selecting it from your Steam Library.
- From the main menu, select the first option: Join ARK.

- At the bottom left corner of the join game screen, change the Server Filter to Favorites.
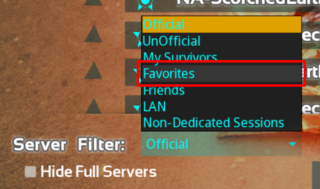
- You should now see a list that includes only those servers that you’ve added through Steam’s Server interface. Just select the one you want and click Join!